Support Center.
Get Started or Become a Pro. Browse our support articles to learn how to get the best out of PeopleGoal.
Schedules
PeopleGoal Schedules are incredibly useful to automate your app workflows by triggering automatic items, reminders and notifications for app participants. Schedules can be set up in a few quick steps after you've polished up your app template, and once you're done you just leave them to do the work and create the performance cycle for you.
Jump straight to:
Create a Schedule
To create a new schedule:
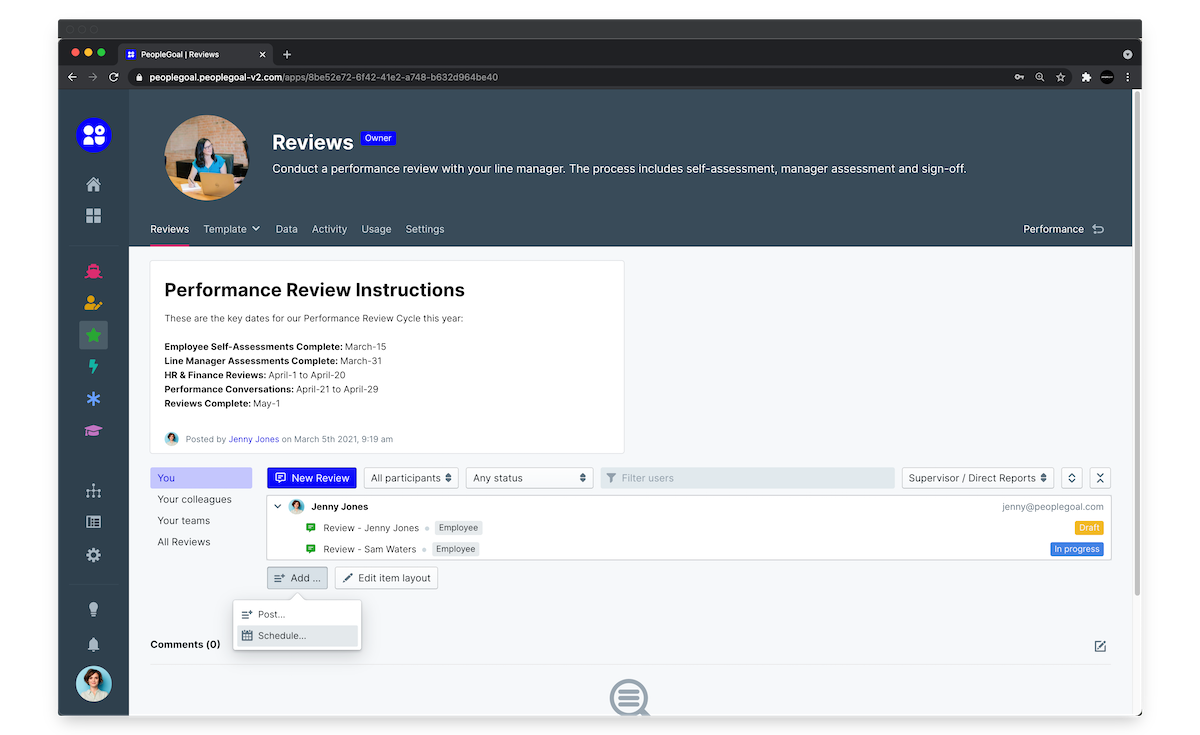
- Open up your App homepage.
- Select Add underneath your item view, then Schedule.
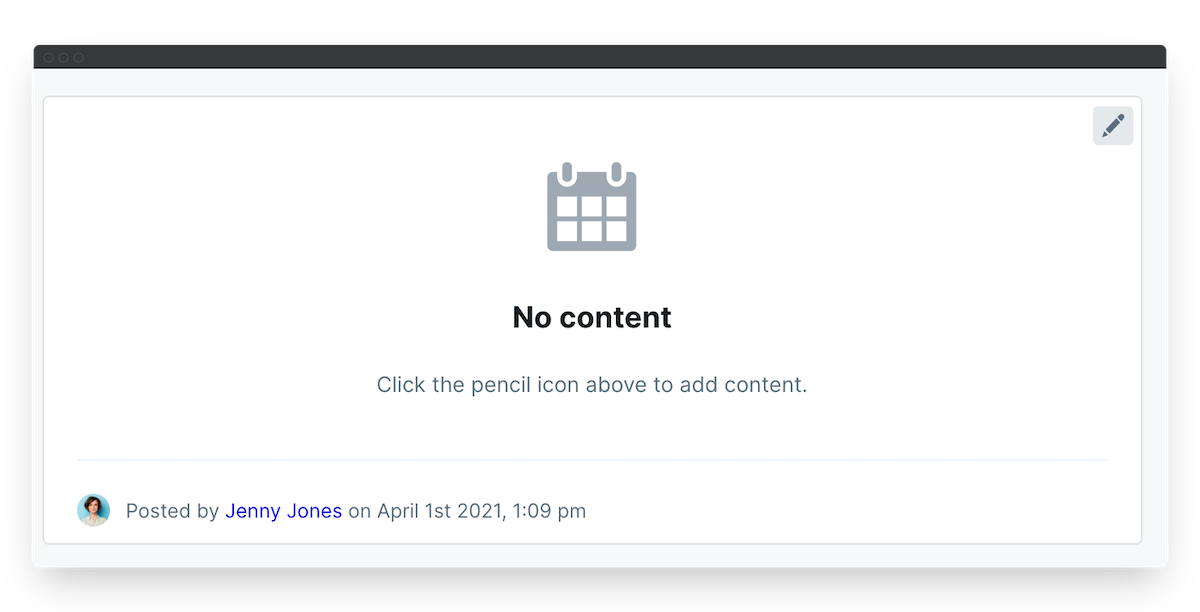
- A draft content box will appear at the top of your item view.
- Click the pencil icon in the top right to open up the content editor.
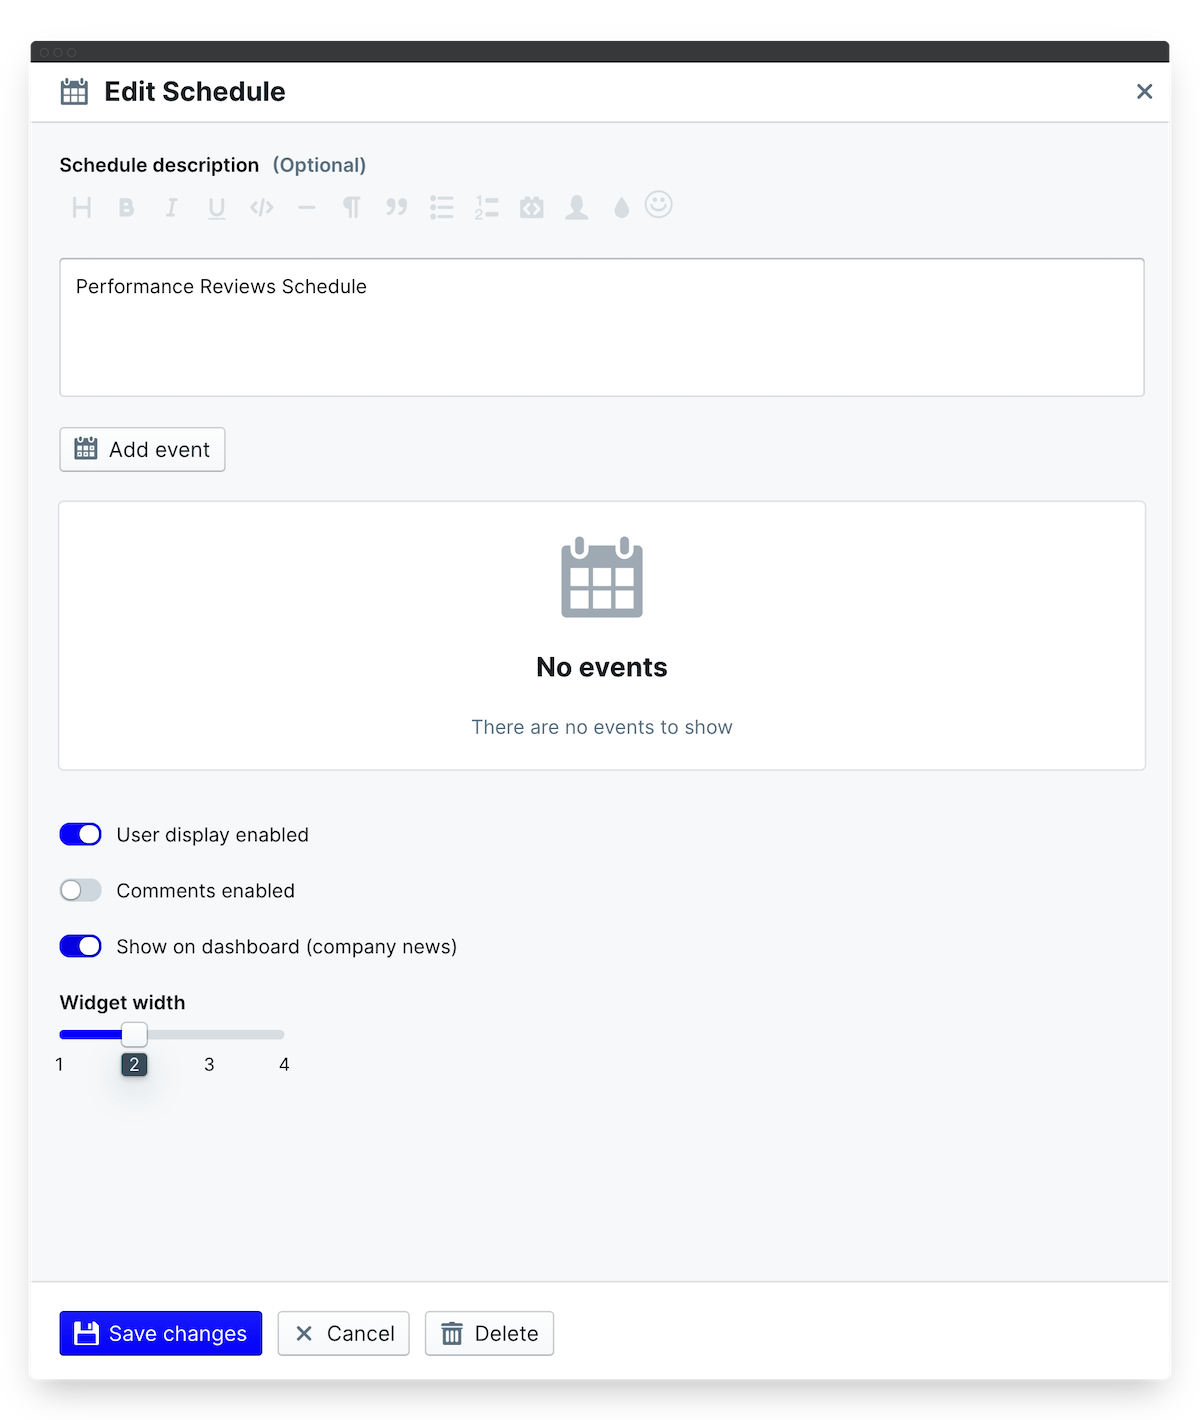
- Enter an optional title for your schedule in the Schedule description field.
Add events
Events are the actions you want the schedule to trigger, and you can add as many events to a schedule as you need to! An event may be a custom reminder notification or an action to automatically create items for users within this app. You can schedule your events based on either a fixed date on the calendar, or a variable date based on one of your profile date fields.
- On the Edit Schedule view, click Add event.
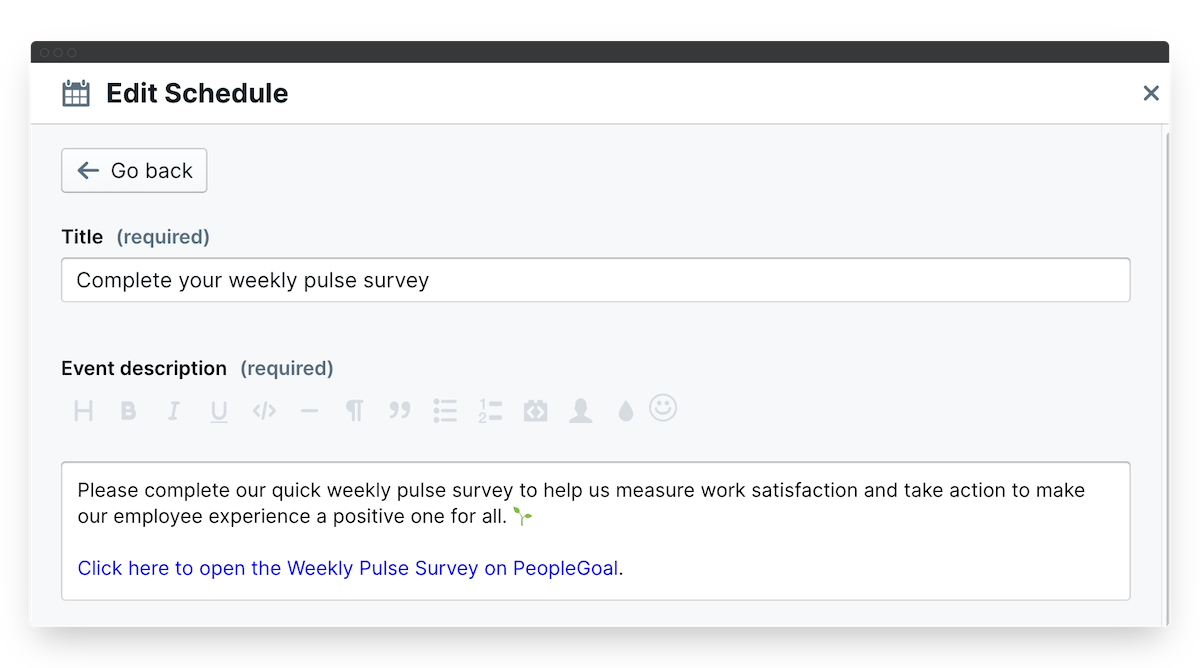
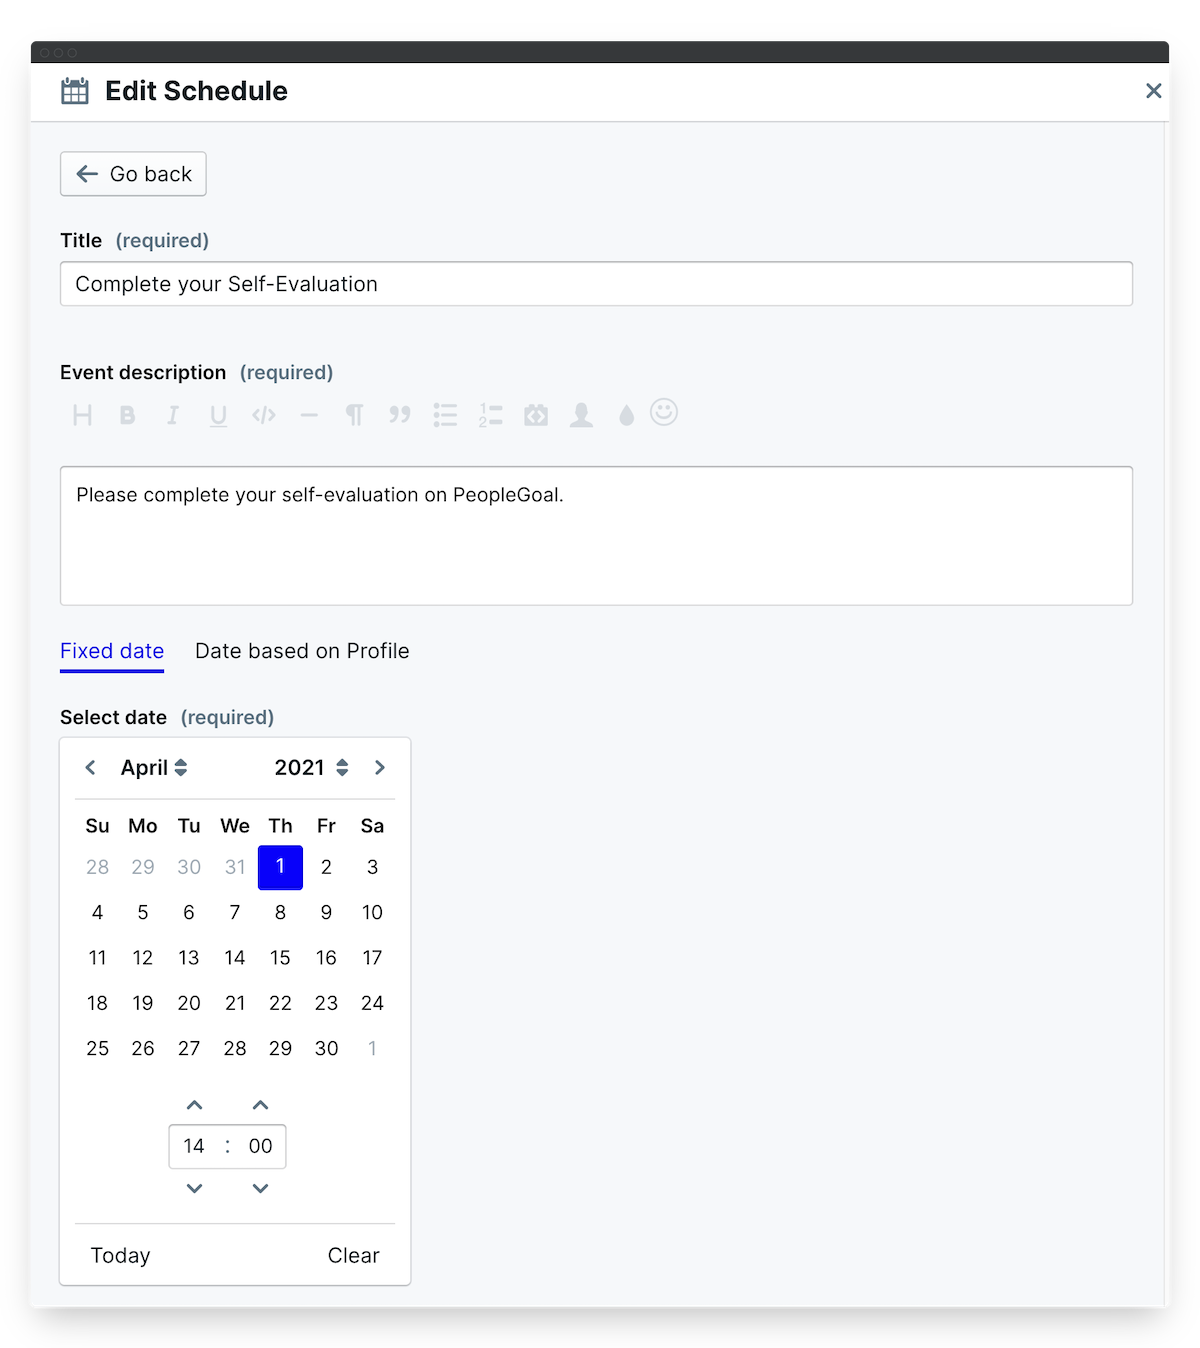
- Your event will need a Title and a Description. These will trigger email notifications with the Title becoming your email subject and the Description becoming the email body text.
- Tip: it's always a good idea to include a link to your app in the event description. Just copy the app URL, type your link preview text (e.g. "Click here to view the Onboarding app on PeopleGoal"), highlight this text and paste the app URL in the link that appears.
Create events on a fixed date
- On the calendar, select the date on which to trigger the event.
- Type in the time in the field underneath and you're done!
Create events based on profile dates
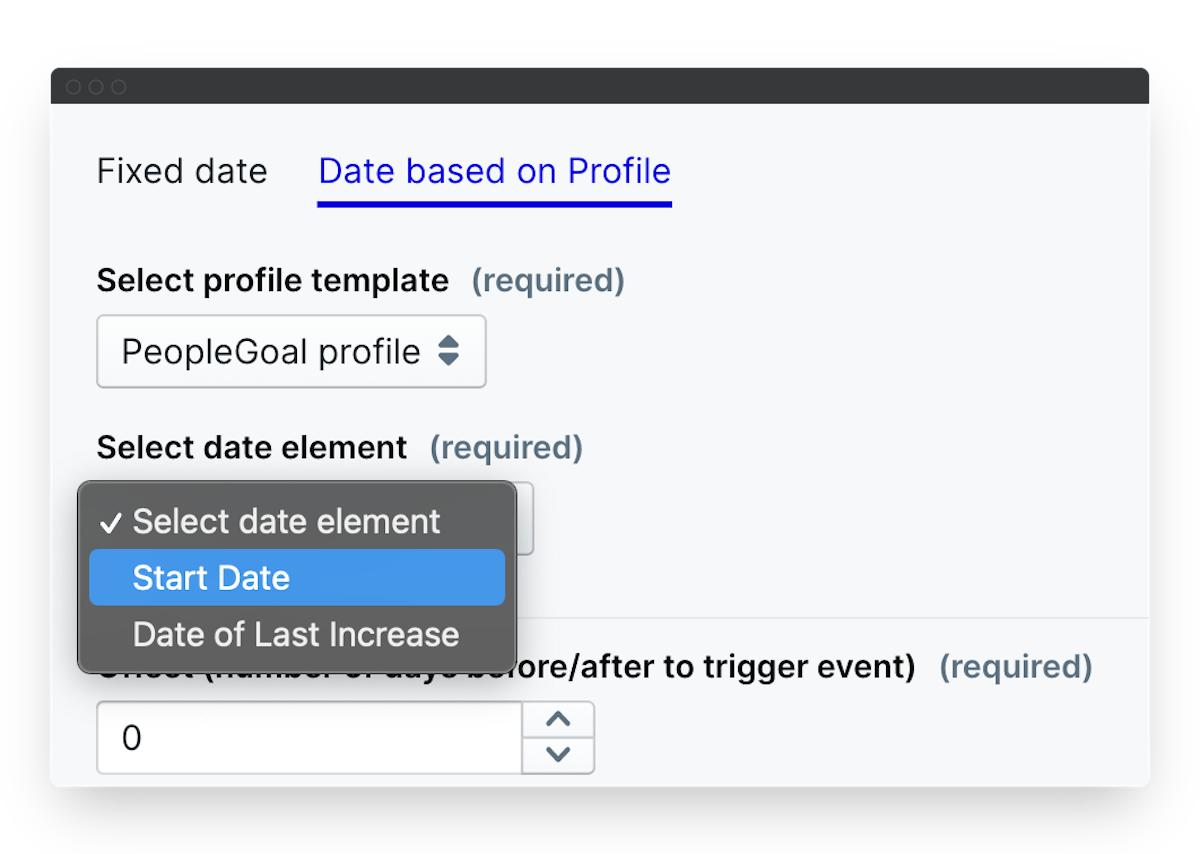
- Select the Date based on Profile tab.
- Select the Profile template you want to reference (remember, you can have many different profile templates!).
- Then select which date element from the profile on which to base your event.
Send reminders
In addition to your event notification, you can trigger reminders to go out before the event occurs. For example, you may want to remind all employees that their self-evaluations are due 5 days before the event date (due date).
You can also offset your event a number of days before/after the selected date field (whether that's a fixed date or a profile date). This is useful particularly for your Onboarding processes, where the employee start date becomes a reference for their onboarding checklists and new joiner surveys. In the case of the new joiner survey, you'd select a 30-day offset so that the survey is triggered exactly 30 days after the start date on the employee's profile.
To set up reminders:
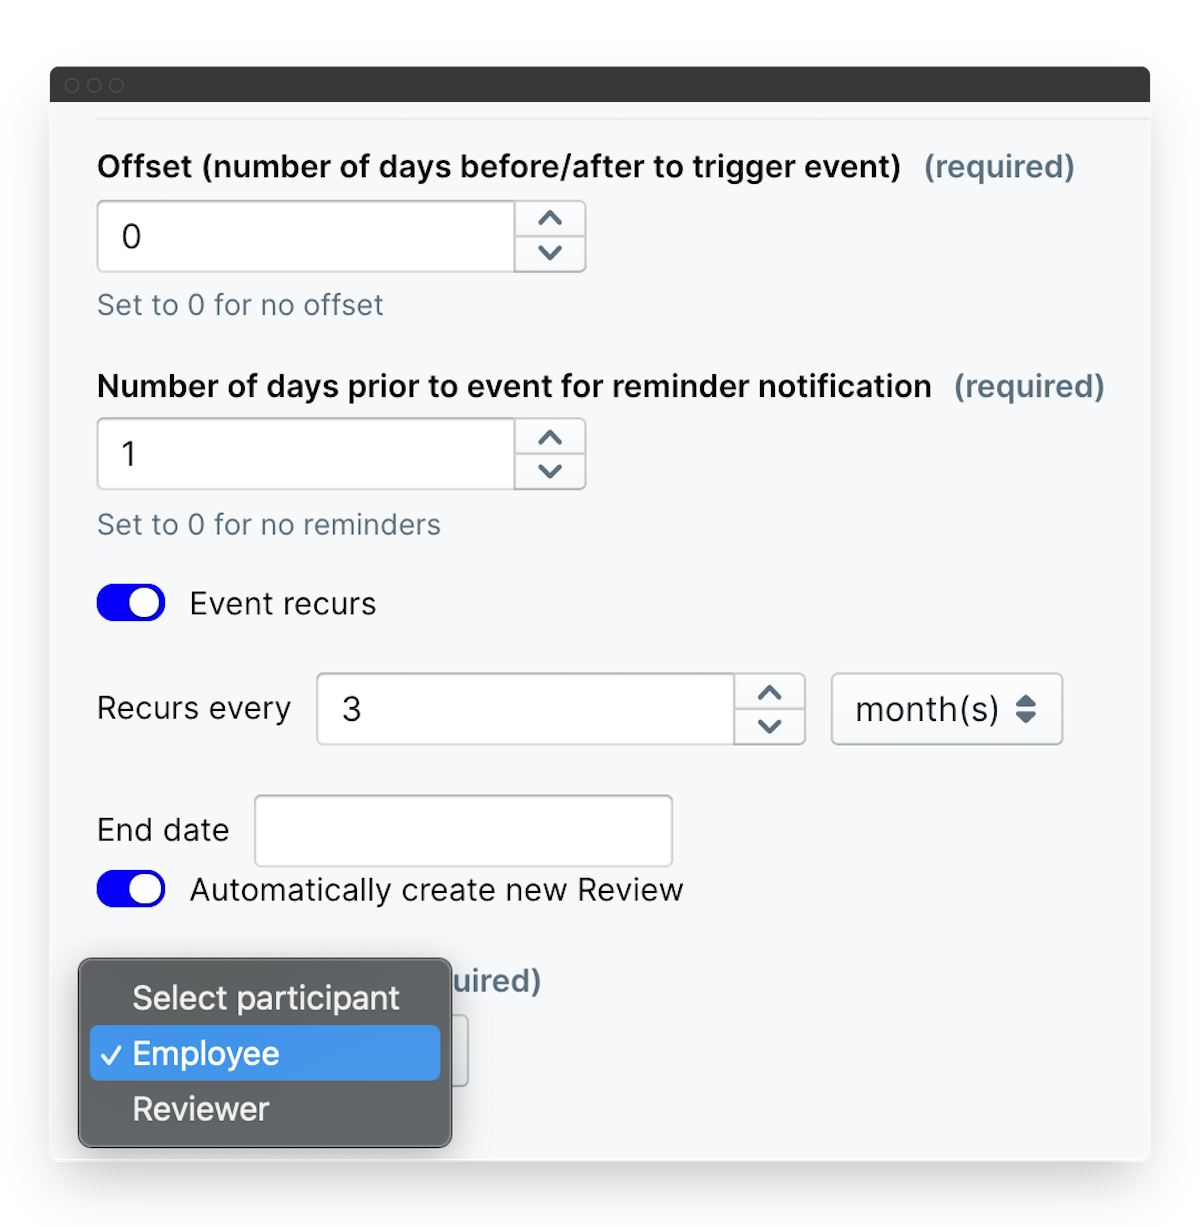
- Type in or press up/down in the Offset field. Or, leave this at '0' if needed.
- Select the number of days prior to the event you'd like to trigger a reminder. For example, if you want to remind all users 5 days before their self-evaluations are due, select '5' in this field.
- Leave this at '0' for no reminders.
Automatically create items and set recurring events
Lastly, you can make our events repeat as many times as needed and set your app to automatically create items on your event day. To schedule these:
- Toggle the Event recurs button on and select your frequency.
- Add an optional End date on which to stop the event recurring.
- Toggle on Automatically create new item to generate a draft item in the first state for all app users.
- To automatically create an item you'll need to Select the participant in the workflow. For example, when setting up anniversary-based performance reviews, select your "Employee" participant to automatically create a draft self-evaluation for them.

Remember to click 'Save changes' to save your updates!
Schedule Settings
There are four schedule setting toggles that control how and where your schedule appears:
- User display enabled switches on/off your username and date showing who created the schedule and when. Switch this off if you prefer anonymity in your apps!
- Comments enabled will allow all app users to comment on this schedule.
- Show on dashboard will display this schedule under the Dashboard > Company news section of any user who has permission to view this app.
- Widget width controls how wide the schedule appears on your App homepage. If you've made an instructional post on your app it's a good idea to have these both at half-width so that they don't take up the entire App hompeage.

Delete a Schedule
- And finally, if ever you need to remove an event, just click the pencil icon to open up your Event editor.
- Select Delete at the bottom of the content box, then confirm your deletion.
PeopleGoal Team
General content from our team

